Paleo Poptarts (Egg-free)

Paleo Poptarts (Egg-free)

It has not been easy finding recipes with my preferred ingredients and the correct food restrictions our family currently has. But without that difficulty, I would not have fully returned to this blogging space like I have!

When our sweet girl’s allergy test results came back telling us she had dairy and egg allergies I was at a loss of where to start. I researched on Pinterest and then just started trying a lot of new recipes and was quickly disappointed with the mushy results.

So after a lot of disappoints and a little bit of failed venturing on my own, I have finally started to get the hang of this whole egg-free baking thing. I have certainly not mastered it, but I am slowly learning how the science of egg-free baking works. For sure 1 egg does NOT equal a banana or a certain amount of applesauce. At least in my experience this is not reality.

I am hopeful that one day soon my sweet girl will be able to have eggs. Until then I am going to keep figuring out recipes for her. Which brings us to this one!

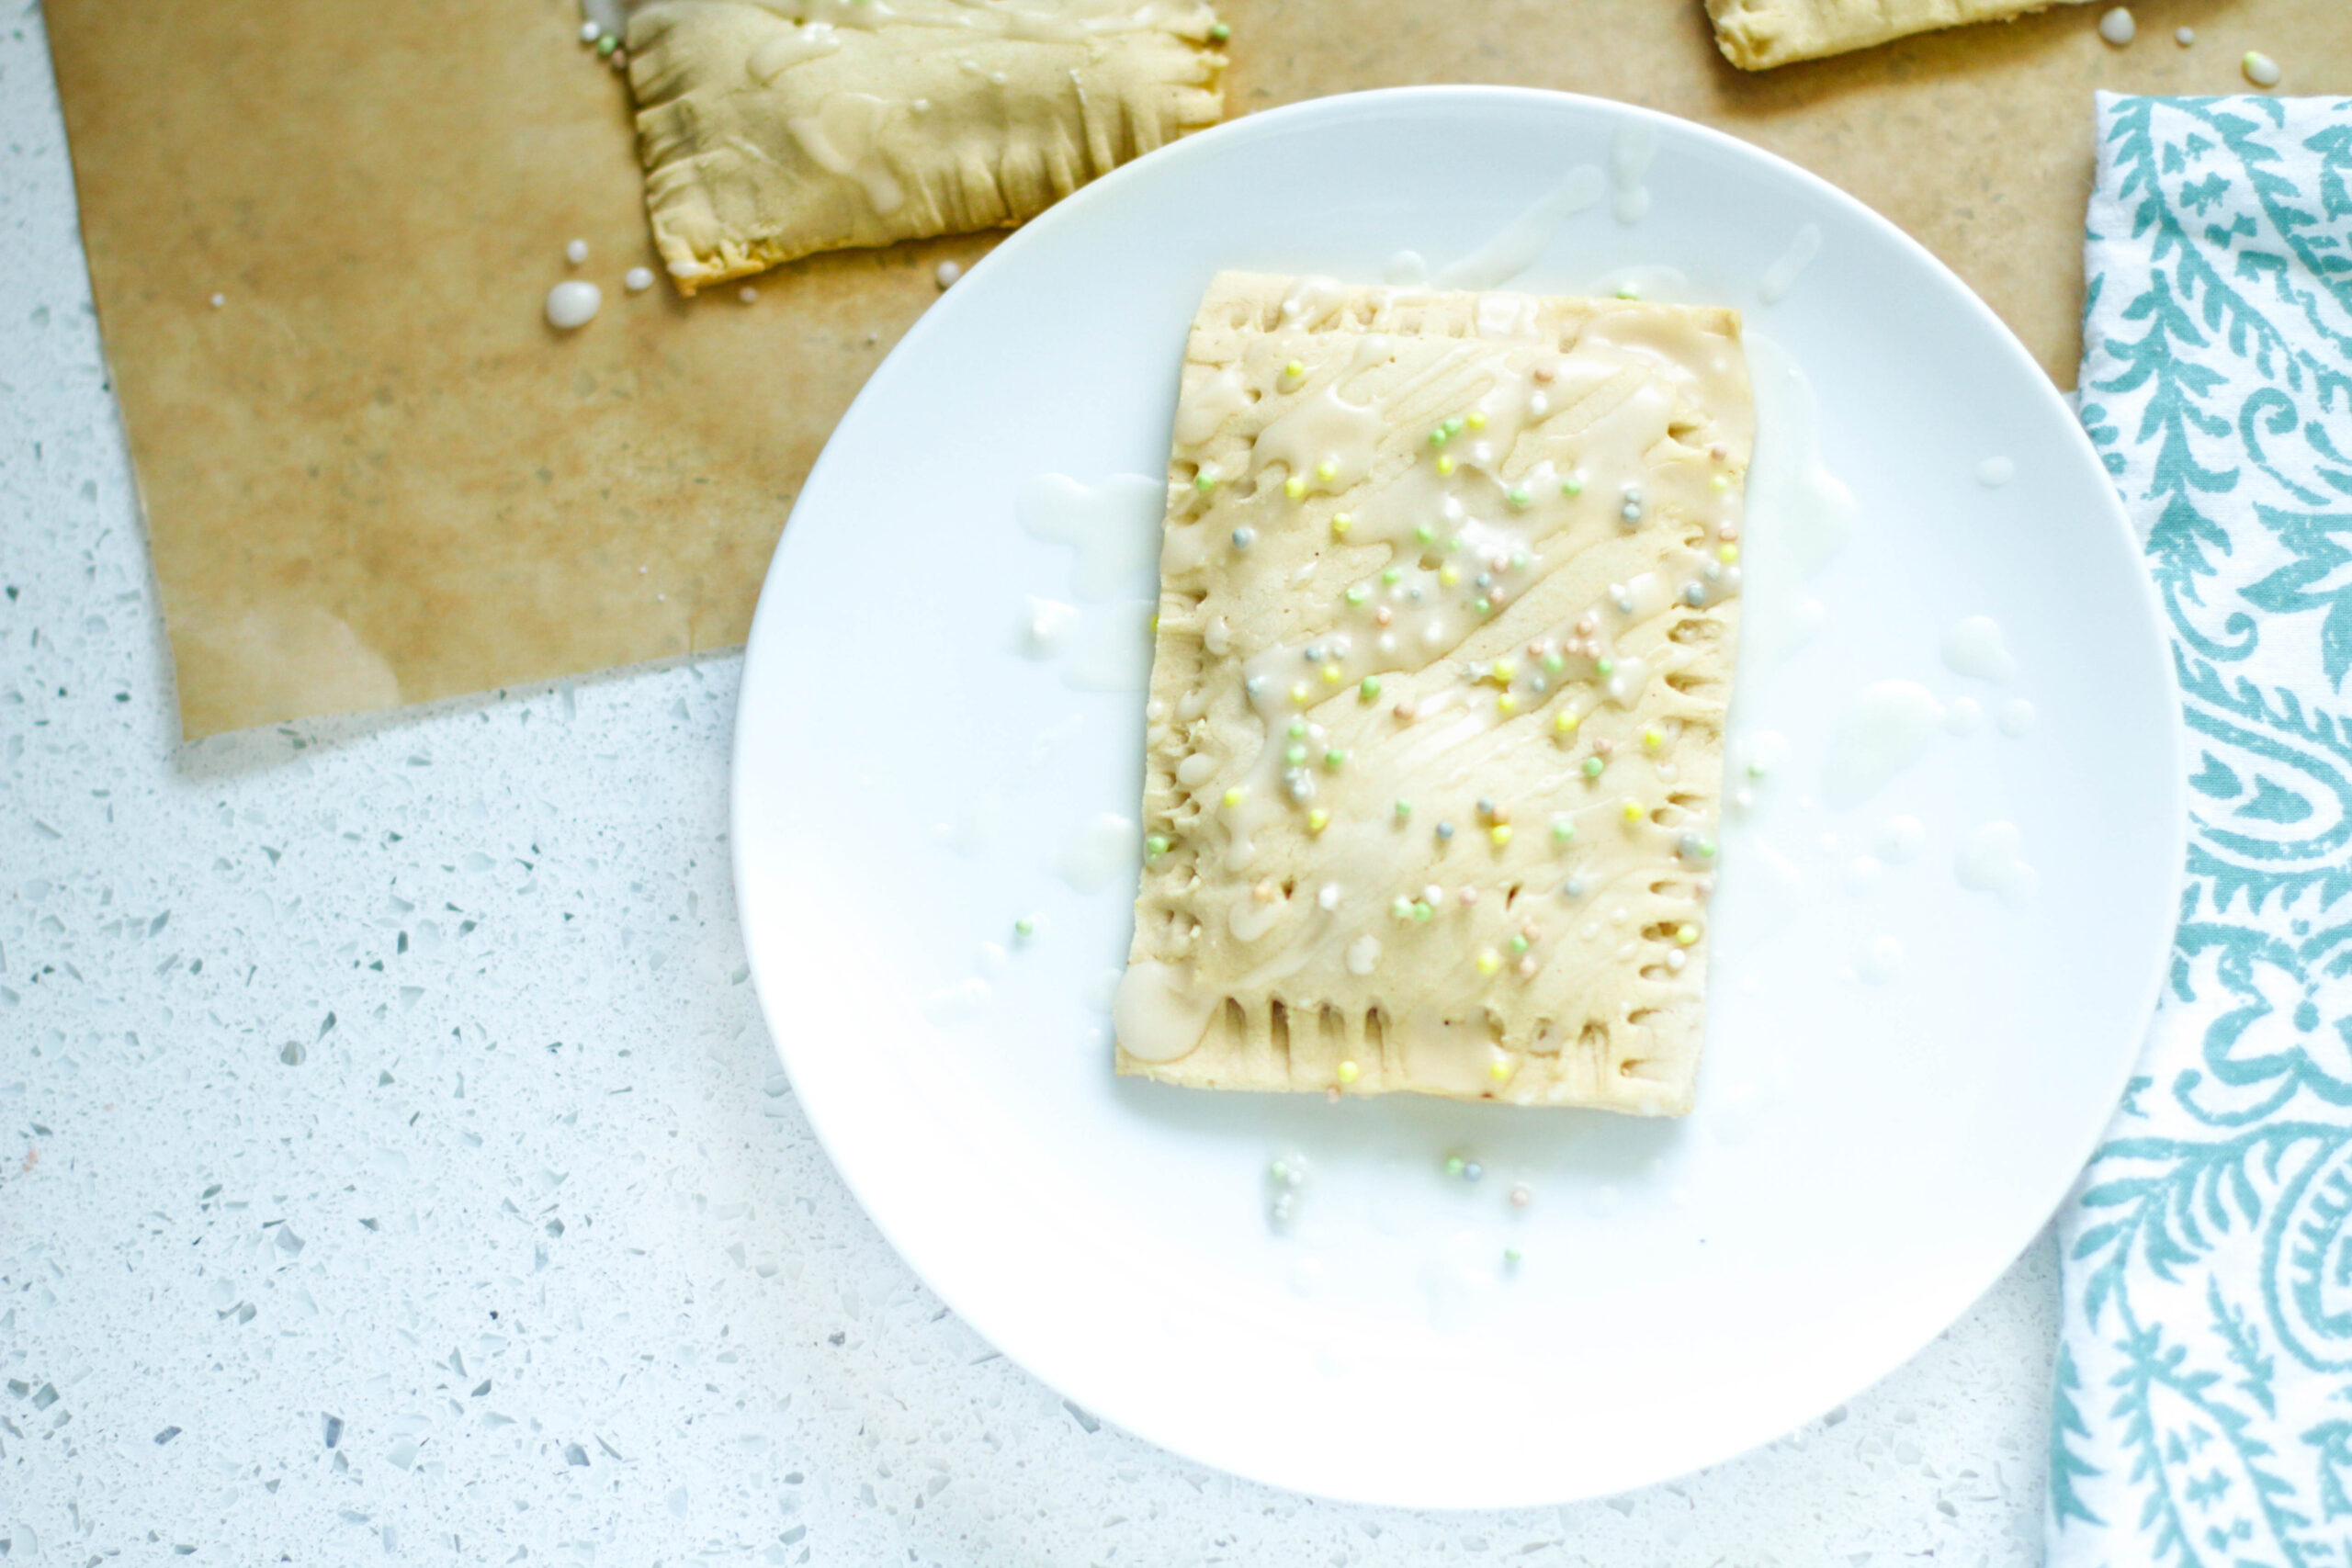
Along with eggs, this recipe is also free of dairy, soy, nuts, grains and gluten. To make it refined sugar free you can also skip the icing and sprinkles and use coconut butter instead.

You do have to make the strawberry filling ahead of time, but it’s SO WORTH it. My kids love the filling so much. My sweet 2 yr old stood on a chair at the counter and before I knew it she had downed half of a batch. If you are like me and don’t always plan ahead of time…. you can substitute strawberry jelly or any other jam you have on hand.

I used Let’s Do Organic sprinkles on top. I love that they are free of artificial coloring and are fairly priced.

I loved eating poptarts as a kid and it brings me so much joy to offer my kids a similar experience! Would love to hear if you try the recipe. Leave a comment below with what you think.

(Click here to go to recipe post if recipe not shown below.)

Paleo Poptarts (Egg-free)

Recipe by Emily CoatneyCourse: BreakfastCuisine: AmericanDifficulty: Easy
Servings

10

servings
Prep time

30

minutes
Cooking time

21

minutes

Ingredients

  • 1 and 2/3 cup Cassava flour

  • 1/3 cup potato starch (tapioca starch as sub)

  • 1.5 tbsp coconut flour

  • 1 tsp baking powder (I like Pamela’s as it’s grain-free)

  • Pinch of sea salt

  • 3/4 cup palm shortening

  • 8 tbsp ice water

  • 1/4 cup honey

  • 1/4 cup coconut milk (canned full fat or light)

  • Strawberry Filling (Make ahead of time – Sub your fav jam)
  • 1/4 cup honey

  • 1/4 cup water

  • 1.5-2 cups frozen strawberries

  • Icing
  • 1/4 cup organic powdered sugar (typically free of corn)

  • 1-2 tsp water

  • 1/2 tsp vanilla extract

  • Tools
  • parchment paper

  • rolling pin

  • knife

  • baking sheets

  • Optional, but ideal: stand mixer (paddle attachment) or pastry cutter or hand mixer

  • fork

  • 2 quart pot

  • large mixing bowl

  • potato smasher

Directions

  • Preheat oven to 350 degrees F. Line two baking sheets with parchment paper. Make sure your baking sheets are at room temperature or cooler. Note: The strawberry filling should be pre-made and refrigerated for at least 2 hours. You can substitute your favorite jam.
  • Combine all dry ingredients in a large mixing bowl (or in the bowl of your stand mixer), whisk to mix well.
  • Add spoonfuls of the palm shortening to the dry ingredients, dispersing throughout the flour.
  • Combine the flour and palm shortening until the texture is coarse and crumbly. For a stand mixer, using the paddle attachment, and for a hand mixer, mix on low speed. Alternatively you can use a pastry cutter or a fork.
  • Add the honey and coconut milk, mix on low or stir with wooden spoon or silicone cake spatula.
  • One to two tablespoons at a time add the cold water while mixing on low (or stir after you add a couple tablespoons. Combine until a dough ball starts to form. You may need more or less water. Gage on of the dough has come together in a ball. Cassava flour brands range in absorbency.
  • Lay out parchment paper on your counter and dust well with cassava flour and tapioca flour. Coat your hands in some flour as well. Grab your dough ball and shape into a thick flat square (about 7-8in wide and long.) This will just make it easier to roll out. Dust the top with tapioca flour and then add another parchment paper sheet on top.
  • Grab your rolling pin. Over the top of the parchment paper roll out the dough until it is about 1/8 in thick. Once you have it rolled out grab a knife and cut out the largest square/rectangle possible – the goal here is to basically just give yourself straight edges that will lead to getting even pop tarts. Gather the excess dough and set aside for the next round of rolling out dough.
  • Take your knife and slice through your dough to form as many rectangles as possible – sized around 3in by 5in to 4in by 6in. As you go about assembling you will have to repeat the process of rolling out the dough to make more rectangles. Continue to dust your surface and dough with tapioca or cassava flour.
  • Grab a thin spatula, metal is best. On one of the parchment paper lined baking sheets transfer 6 of the rectangles (spread them out evenly.)
  • Grab your filling and place around 1-2 tbsp in each rectangle, spreading it to to around 1/2 inch away from the edge.
  • Using the metal spatula transfer additional dough rectangles to top the filling covered ones. Lightly press the edges together with your fingers. Follow with a fork to seal it. With a toothpick or knife poke around 6-9 holes into the top layer, careful to not pierce past the fist layer of dough.
  • Repeat this process until all the dough is used. You will end up with around 9-12 pop tarts – If I have dough leftover that’s not enough for a full poptart I just make a circle with it, add a little filling in the middle, food it up and seal it.
  • Bake for 21-25 minutes until the bottom is golden. The longer the bake the more crispy they will be.
  • Let cool for 5 minutes. While they cool prepare icing. In a bowl add the powdered sugar, and then add 1 tsp of the water and the vanilla. Stir. It will slowly combine. Add the remaining 1 tsp of water until the consistency is thin enough to drizzle. Test by lifting the stirring utensil up and seeing how the icing falls. Alternatively for a refined sugar free option – You could melt some coconut butter and add a little honey and vanilla. They are yummiest eaten right away but can stored on the counter and reheated. See notes for reheating information.
  • Strawberry Filling Directions
  • Add strawberries and water to a pot around 2 quarts or so. Cover and heat at medium heat.
  • Once the water is boiling, remove the top and check the softness of the strawberries with a fork. Once they are fully thawed, remove from heat and just right in the pot, take a potato smasher or a similar tool and smash the strawberries.
  • Return to medium heat, add honey and then while stirring often allow to come to boil (WATCH CAREFULLY!!!). Once it boils, turn to low heat to simmer. Continue to stir until the mixture is at a simmer to prevent it from boiling over.
  • Simmer for 45 min – 60 min until the filling has thickened. Stir throughout to make sure it doesn’t burn. You will know it it is finished when if you run a spoon through it you can see the bottom of the pot for a moment.
  • Spoon in to jar and store in fridge until fully cold. Ready for use once it’s thick and cold!

Notes

  • Store on counter in airtight container. I recommend waiting to add the icing until you’re ready to eat one after you have heated it. Best reheated in the oven at 350 or in a toaster oven.
  • You could also freeze them once baked – then once ready to eat set them out to thaw and then heat in oven. Our family has 5 people so all of my recipes will begin to have much larger quantities to account for this!

Enjoy! Thanks for reading. ♥️

Previous post

Written by

Leave a Reply